

Composite steel decking is a common floor system used in multi-storey buildings. It’s something I work with a lot when modelling and detailing in Revit. In this blog post I will share how I do it, as well as a tip about cantilevers that I picked up recently from a colleague.
A quick note, whilst you could model the decking so you can see the profile in 3D, this is generally thought of as overkill! It’s just not necessary and will quickly slow down your model. This is especially true if you have a lot of storeys and steel decking. The best method is to create a Structural Decking floor type which will show the cut profile in sections and elevations, depending on the span direction. Read on to find out more:
Revit Structural Decking
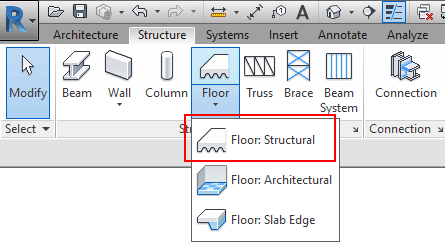
The first thing we need to do is create a new Structural Floor. We do this by going to the Structural Tab, and on the Floor drop-down select Floor: Structural.
Floors (as well as Walls, ceilings and roofs) are what we call System Families. This means they are pre-defined in Revit templates and projects, and are not loaded-in from external files (these are called Loadable families). This means to create a new Floor type, we have to open the Type Properties of an existing Floor type and click Duplicate.
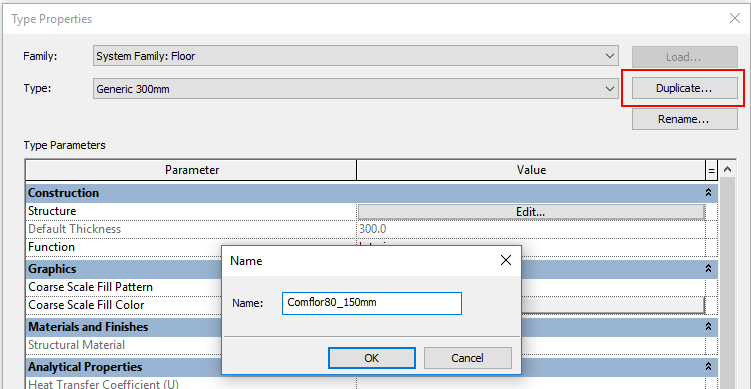
For this example, the composite steel deck flooring I’m going to create is a Comflor80 with a 150mm Slab depth. After I have named the new floor type, on the Structure parameter under Construction I hit the Edit… button.
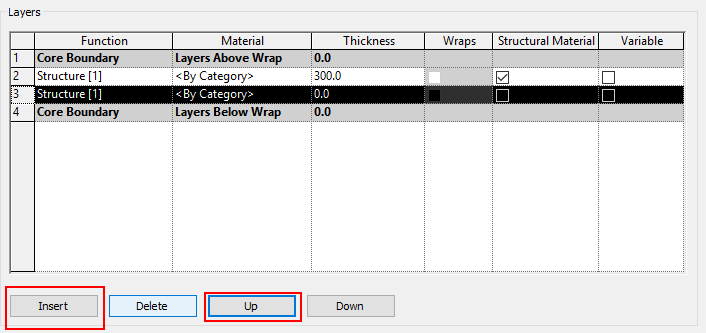
This opens up the Assembly dialog box. For a Metal or steel deck floor system, you need to have 2 Layers (ie one for the Metal deck, and one for the concrete topping). Click on the Insert button to create a new layer, and use the Up and Down buttons to move them into the correct order.

On the Function column to the left, you can select from the drop-down the appropriate category. For this instance, select Structural Deck [1]:
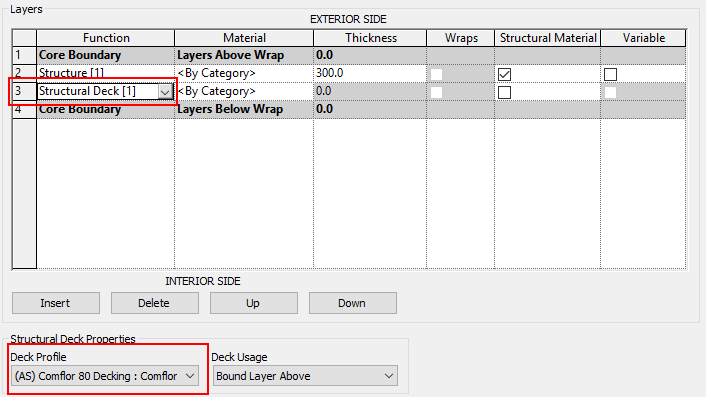
This brings up the Structural Deck Properties option below. This is where you can choose your desired Steel deck profile. You need to have a profile loaded in to your project first before you can select it from the drop down.(See here for help on creating a Structural Deck Profile family.)
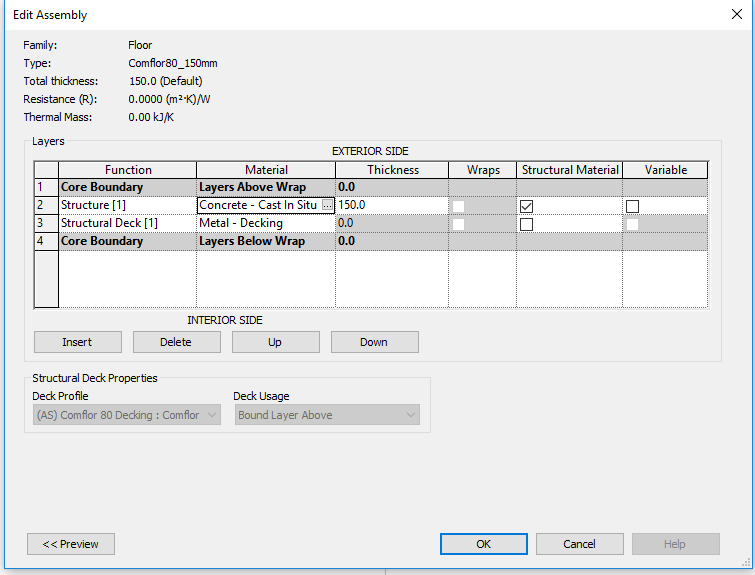
Once your Structural Deck profile is loaded in, modify the top layer to be Concrete, and enter the thickness of your slab (the full slab depth including the decking, not just the topping). Click OK.
Wooh! Now that you have created your Revit Structural Decking floor type, you are ready to create your floor.
Creating your floor and cantilevers
You create your floor just the same as you would any other. You create the boundary, and specify the Span Direction. This denotes which direction your metal deck is spanning and therefore determines what profile you will see in section/elevation.
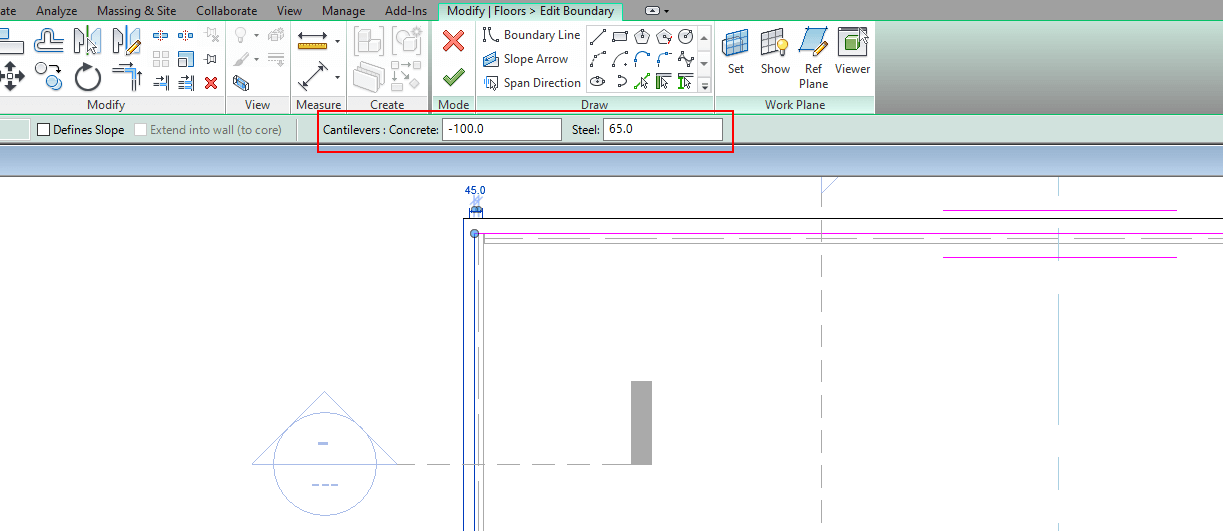
A key feature for Metal decks is the option to add concrete and steel cantilevers. A colleague of mine recently let me know about this one. To create cantilevers, click on the boundary edge you want to modify. You will now see the Cantilevers option appear on the contextual tab. You need to use + or – dimensions to get the seating & cantilever lengths you want.
Using -100 for concrete, and (+)65 for Steel you can see the resulting cantilevers:
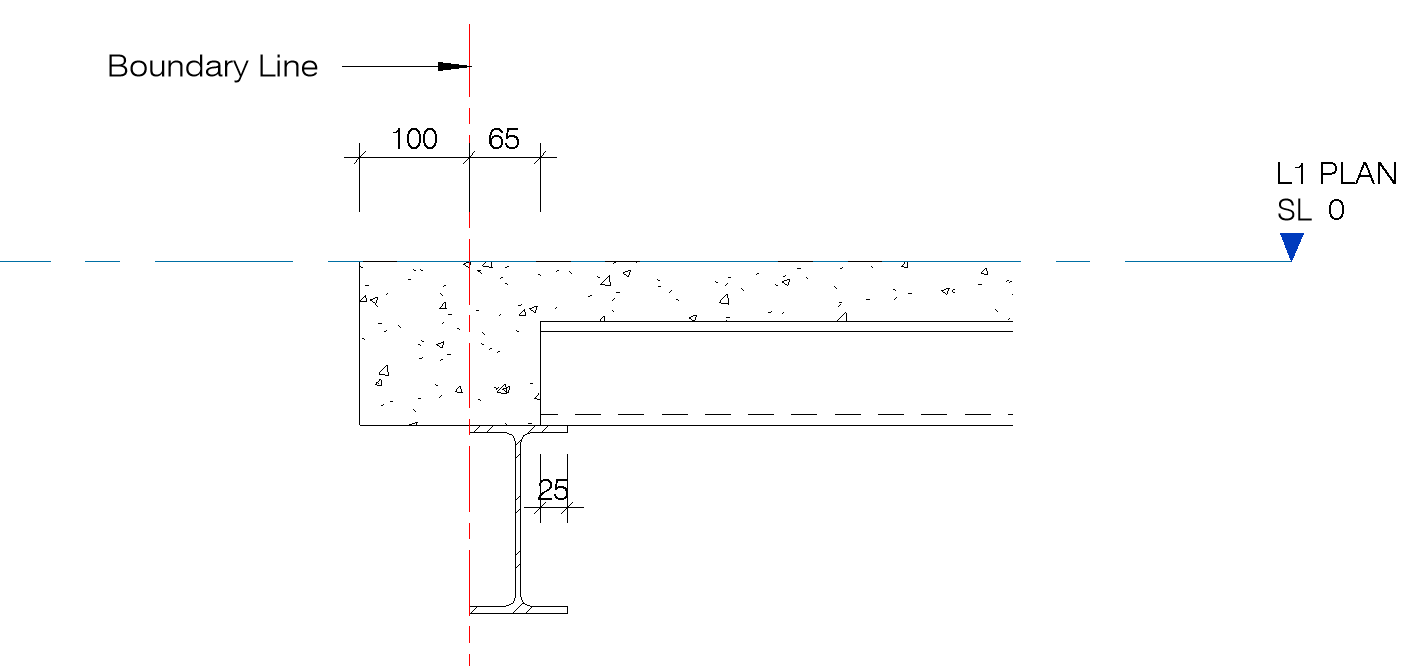
This is such a cool feature! Much better then using filled regions to show cantilevers and seating etc.
With your new Revit Structural Decking Floor type and the help of the Cantilevers function, you can easily create accurate details without using Filled regions or detail components.
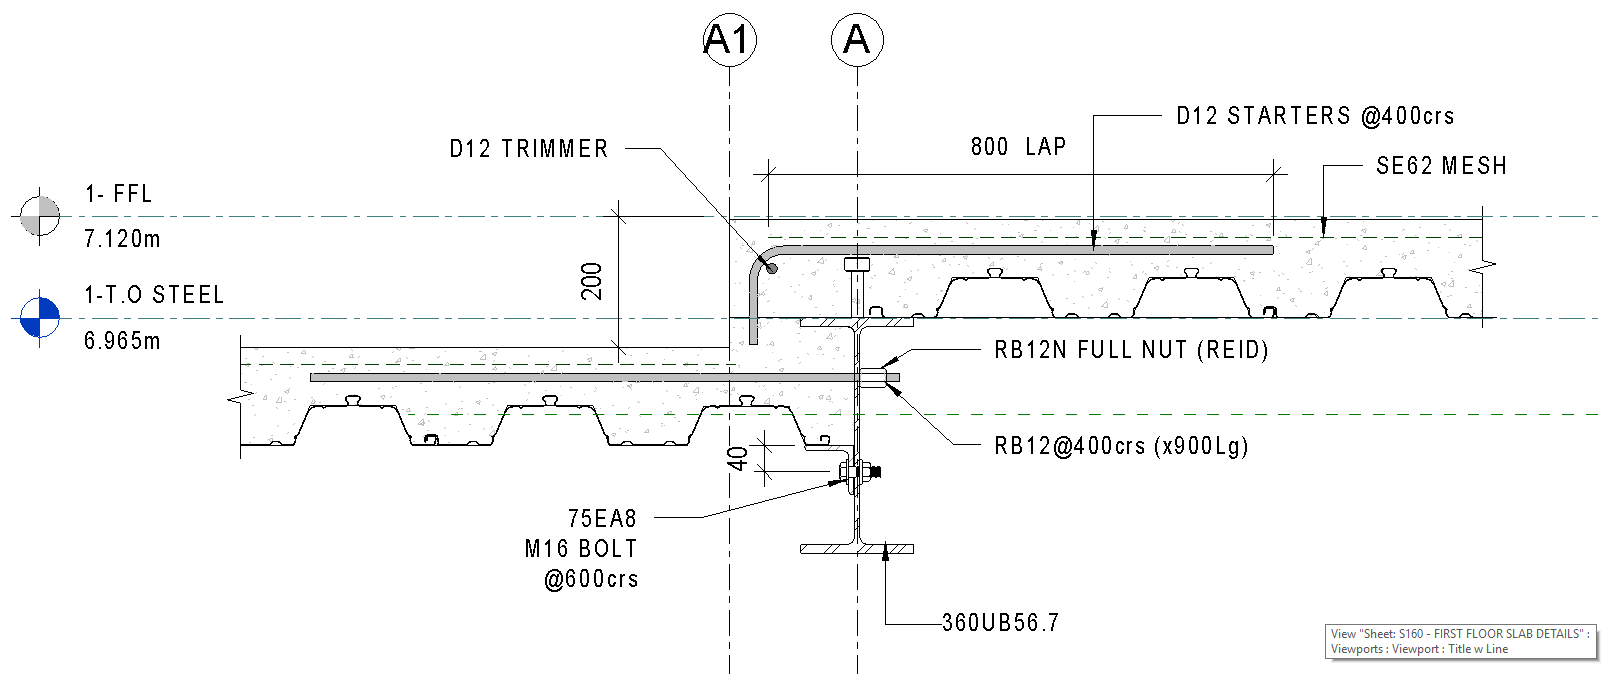
Creating Revit Structural Decking within your floor system is a great way to represent composite steel floors without over-modelling and bogging down your project. With the help of the Cantilevers feature, you now have more control when detailing to get your steel decking correct. I hope this blog post has helped you work smarter, and learn faster!
If you have any questions, or a comment to add then please leave a message below!
If you found this post helpful, please feel free to share it.
-Talk soon
P.S – I’d love to connect with you on Twitter: here
Join the tribe and Subscribe!


