
Have you ever been asked to send a client or consultant your Revit file for them to use? If you have worksharing enabled, do you send your Local file or the Central file? Similarly if you need to archive a Revit model at particular milestones, do you just copy and paste the Revit file into a new location?
These are all common questions which this blog post will hope to answer. I use to get nervous just touching the Central file as I didn’t want to mess any thing up! This blog post will outline and describe each step required to first create a Local file, export Revit models for an external consultant’s use, and lastly archive your revit model the correct way.
Creating a Local file
Starting with the basics, lets create a Local file. It’s good practice to create a new local copy of the central model every day. Creating a new local copy ensures a local copy is always on your hard drive each time you begin modifying a project.
To open a Central model and create a local copy:
- Click

 Open.
Open. - In the Open dialog, navigate to the Central model and select it.
- Under Worksharing, make sure that Create New Local is selected.
 Note: If you select Detach from Central, then Create New Local will be cleared. Clear both options to open the central model itself instead of a copy.
 - Click Open.
You are now working in your own Local file which should be saved on your hard drive, which synchronizes with the Central File located on the Server.
export revit models for other consultants use
Now that you are working in your Local file and saving/synchronizing to the Central model, you may be asked to send a copy of your Revit file for external consultants to use (Services, Architects, Engineers etc.). These are some best practices to follow when exporting revit models, in particular worksharing enabled files.
- Have everyone Synchronize to Central within their local files and close the file.
- Navigate to the Central File and select it, and ensure Detach from Central & Audit are checked (Not Create New Local)

- Once you click Open, a dialog box will pop up. Select Detach & preserve worksets.
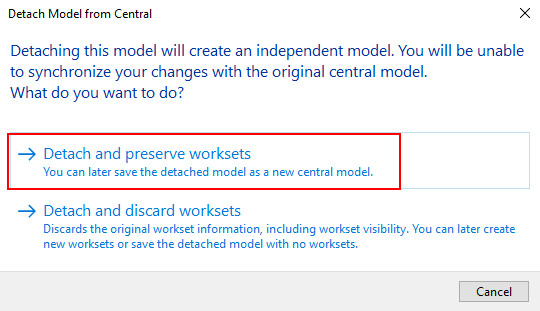 This ensures all worksets used for graphics/presentation purposes remain in place.
 - A good practice is to Purge all unused elements in the model. This helps get the file size down and removes unnecessary items which other consultants do not need. On the Manage tab, select Purge Unused (under Settings panel).

- Next, remove unused Links. On the Manage tab, click Manage Links (under Manage Project panel). Click through the tabs to remove all the unused or old links (AutoCAD and Revit) from the file.

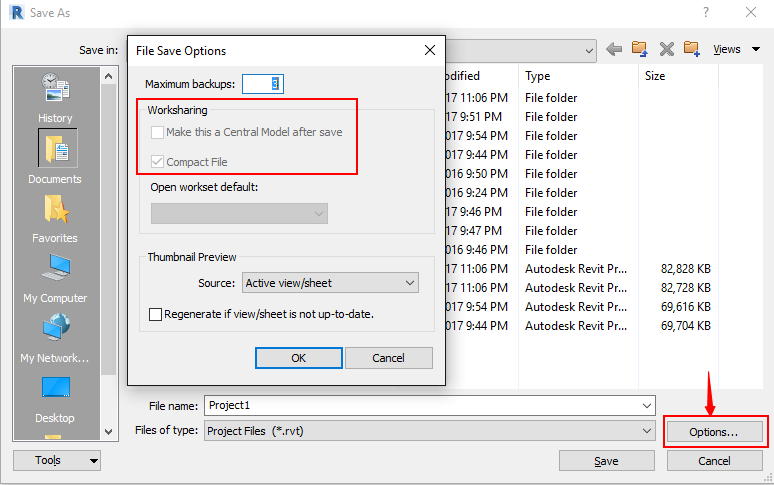
- Finally, click on and Save As , Project.
- Save the file with the same filename as your original Central File but in a new location. Click on Options, and make sure ‘Make this a Central File’ and ‘Compact File’ are checked.
- Once saved, click the Sync button to relinquish all the worksets and save again.
- Close Revit and delete the backup file.
Your *.rvt file is now ready to send to your consultants. Wooh!
Archiving a Worksharing-Enabled Revit Model
Archiving your Revit model is an important way to maintain and keep a record of your project, especially after major milestones. The process is very similar as exporting revit models for other consultants use.
Follow steps 1-6 from above, then:
- Save the file name with the date and/or submission description appended, within a specific archive folder on the server.
- For all Revit models that are linked into your central model, follow steps 1-6 from above for each file (if they are central files themselves) and save them into the Archive folder as well.
- Copy all CAD files that are linked into your model into the same archive folder.
- Archive the Keynote Database file if applicable.
- Within the archived project file, go to Manage Links and re-path the linked files (both CAD & Revit) to the archive folder.

- Similarly, re-path the keynote location to look at the same archive folder.
- Save the file (Save As) as a central model and close.
E-TRANSMIT FOR REVIT ADD-IN
If you are a subscription customer, you can download the E-transmit for Revit add-in. This is a great little add-in which allows you to do all the steps outlined above but from one neat little dialog box. Follow this workflow to package a Revit model for transmission.
- Ensure that all models are closed. On the Add-Ins tab under the eTransmit panel, click Transmit a Model.

- Select the model(s), a target directory, and file types to transmit. You can include all links(CAD & Revit) and image files as well, which is useful for Archiving purposes.
- Optional: Select to open and save models in the active version of Revit (upgrade). e.g save a 2016 model to 2017 etc.
- Optional: If upgrading, select to purge unused families and other Revit objects.
- eTransmit for Autodesk Revit inspects the model, and repaths and saves all linked files and external files in the target directory. If the options were selected, the files are also upgraded and unused objects are purged before the files are saved to the target directory.
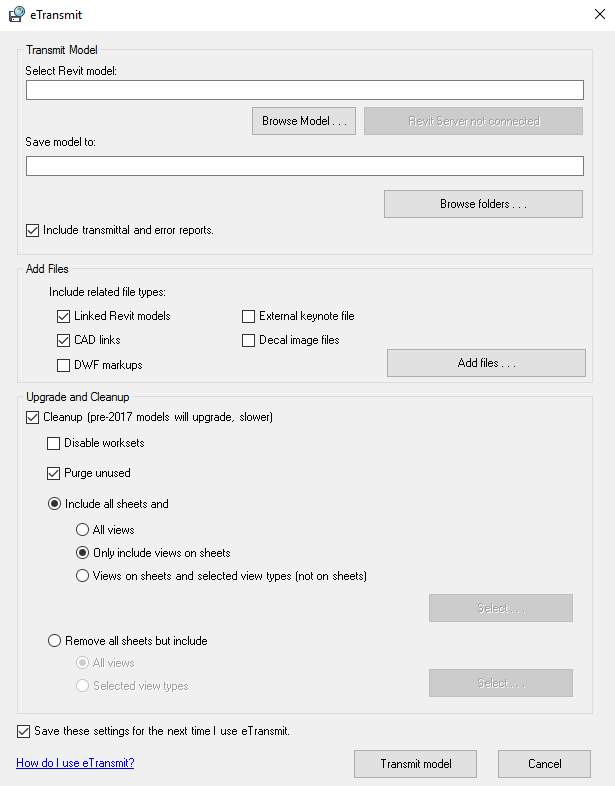
eTransmit for Revit dialog box
It can be a bit tricky to export Revit models, especially worksharing enabled files. These are some solid steps to follow when exporting and archiving, as well as the eTransmit for Revit add-in which is really useful. Hopefully this blog post has helped you gain a better understanding on how to export revit models.
If you have any questions, or you know a better way to export revit models then please leave a comment below!
If you found this post helpful, please feel free to share it.
-Talk soon
P.S – I’d love to connect with you on Twitter: here
Join the tribe and Subscribe!


