

I’ve already mentioned how powerful Revit schedules can be here. They are really useful for displaying model information in your documentation. They are also extremely powerful ways to check and validate our models! That’s what BIM is all about right?!
Revit Schedules can help us save time so we don’t have to manually check our drawings and make calculations. Using Revit schedules to validate our models can potentially save us days worth of manual checking.
Let me show you the benefits of Revit Schedules and how to use advanced tools such as Calculated Fields and Conditional Formats.
Revit Schedules made easy
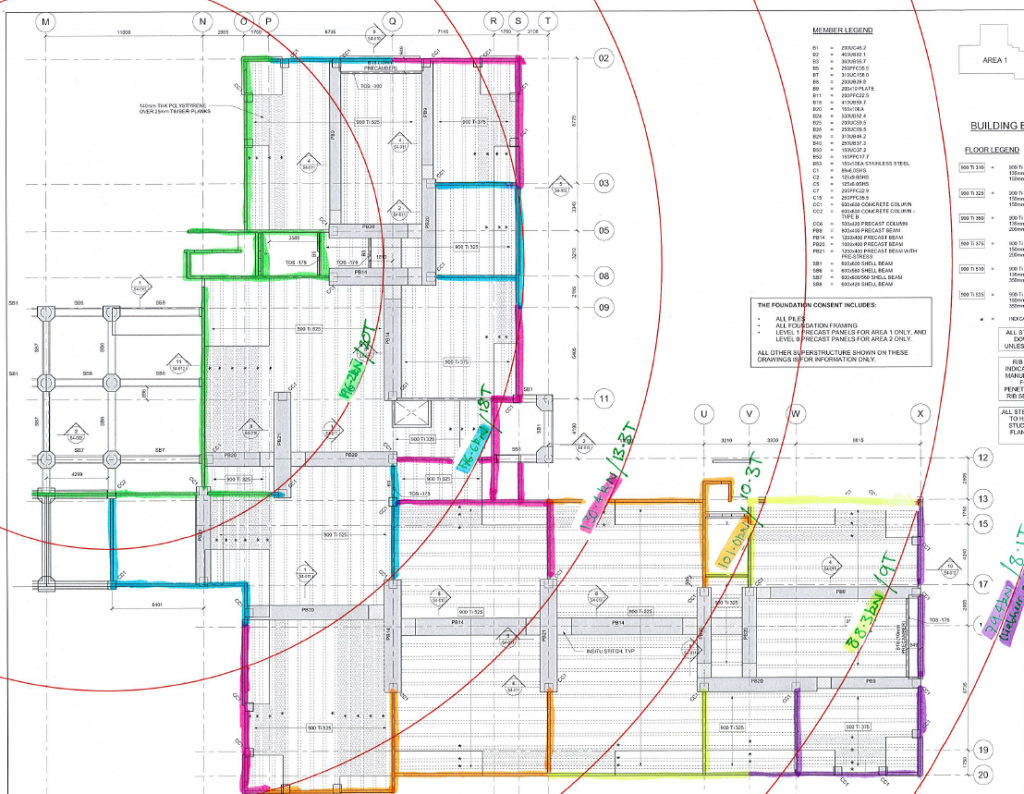
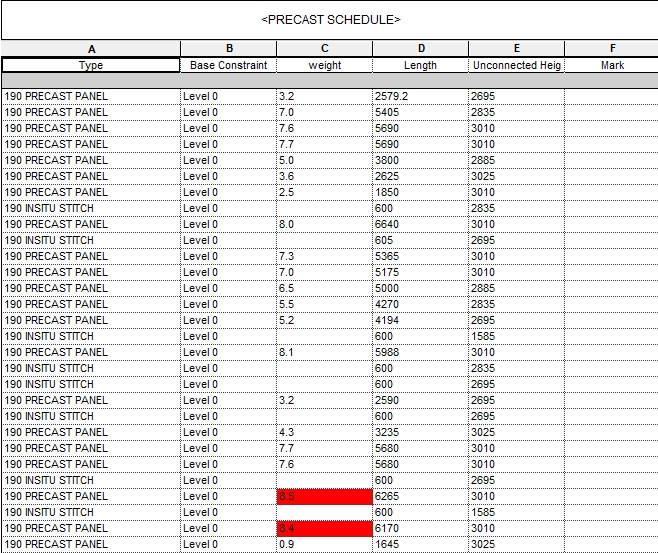
In a project I was working on recently, I had to split the Precast Panels based on the Lifting Weight Radius of the Crane. Certain Precast panels could not weigh more than the max lifting weight at a certain radius as per the image above. After I split the Panels, I wanted to check that each Panel was light enough to be lifted by the Crane. To do this I created a Checking Schedule.
The First thing we need to do is create a new Schedule.
On the View Tab on the Schedules dropdown select Schedule/Quantities
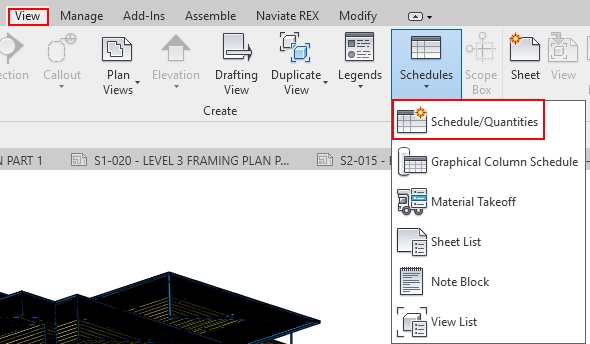
As this schedule is for checking the Precast Panels, I chose Walls from the Category List and hit OK:

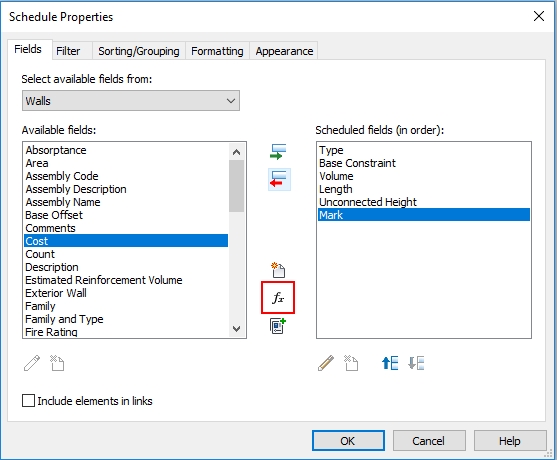
Next add Parameters from the available fields on the left, to the schedule fields on the right.
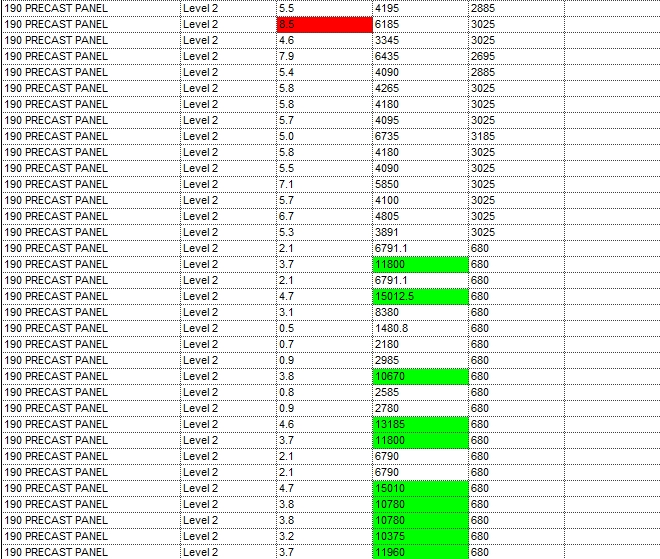
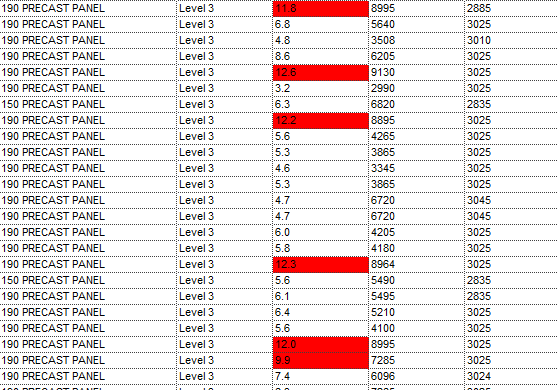
I added Base Constraint so I could organize the panels by level, the Volume so I could calculate the Weight, and Length and Unconnected Height so I can see the Panel dimensions.
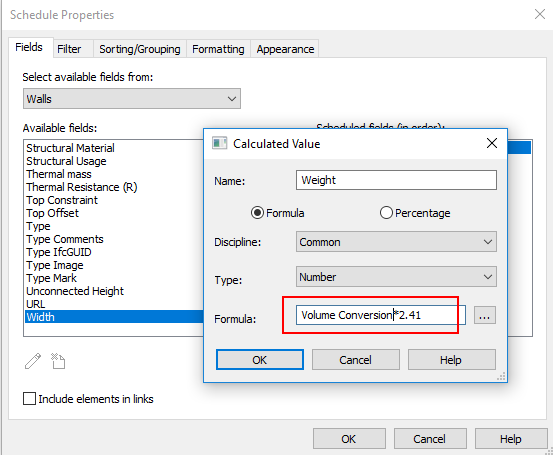
To calculate the Weight, we need to create a Calculated Field. Click on the fx symbol in the center of the dialog box:
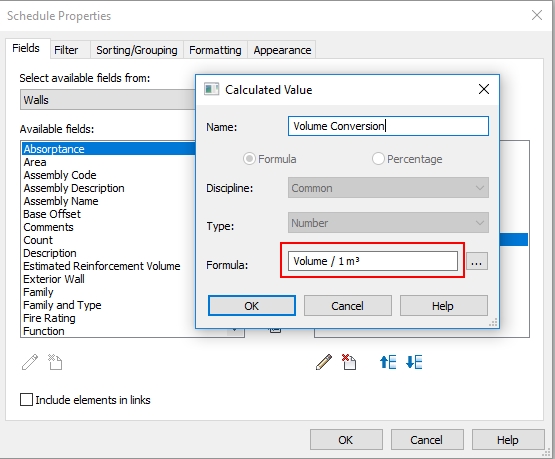
To calculate the weight of a Precast Panel, we need to multiply the Volume by a factor of 2.41. The problem here is that volume has a Unit (m³) and the factor(2.41) does not. So the first step is to convert the Volume parameter into a number. To do this, in the Formula section write Volume (or select the … button and choose Volume) and divide it by 1.
/ is the divide sign in Revit formulas.
Now that Volume is a plain number, we can multiply it by the factor(2.41) to get the weight of Concrete.
Create a new Calculated Value called Weight. In the Formula section we put our newly created Volume Conversion x 2.41
* is the multiply sign in Revit formulas.
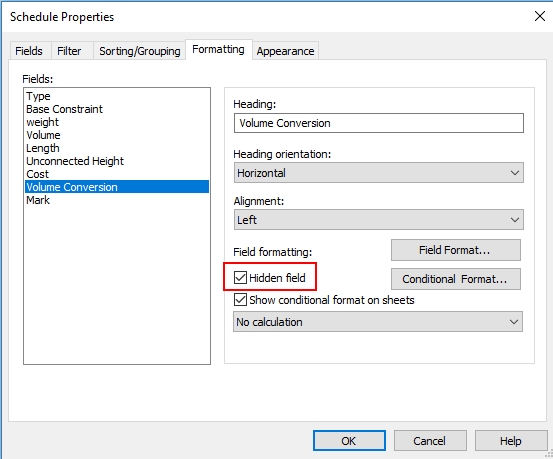
On the Formatting tab, any Field we don’t want to show we can select the Hidden Field check box. This hides the field so your schedule is a lot cleaner. I went ahead and Hid Volume and Volume Conversion as these were only required to get the Weight.
Now for checking my Panels
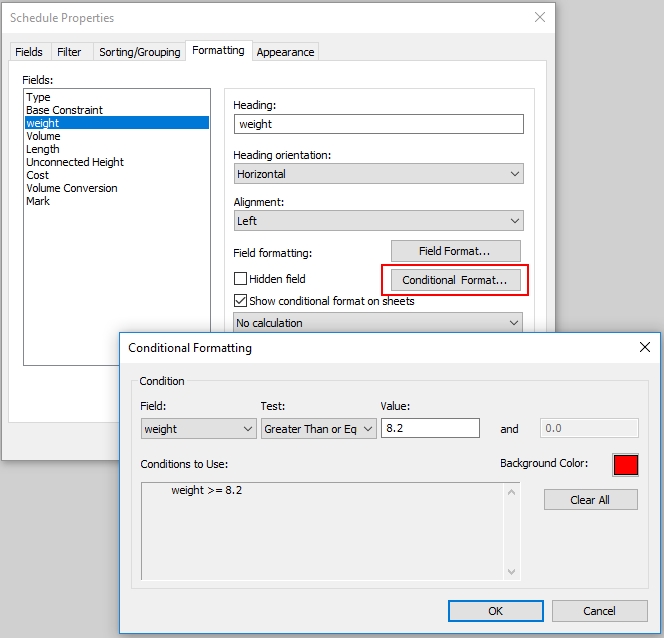
I wanted to see if any Panels are Heavier then 8.2t. This is because this is the maximum Lifting Weight at the largest radius.
In the Formatting tab still, I select Weight and then click Conditional Format. I want to show that if a Panels weight is greater than or equal to 8.2t, it will be highlighted by the Background Color as Red (The color of Danger!).
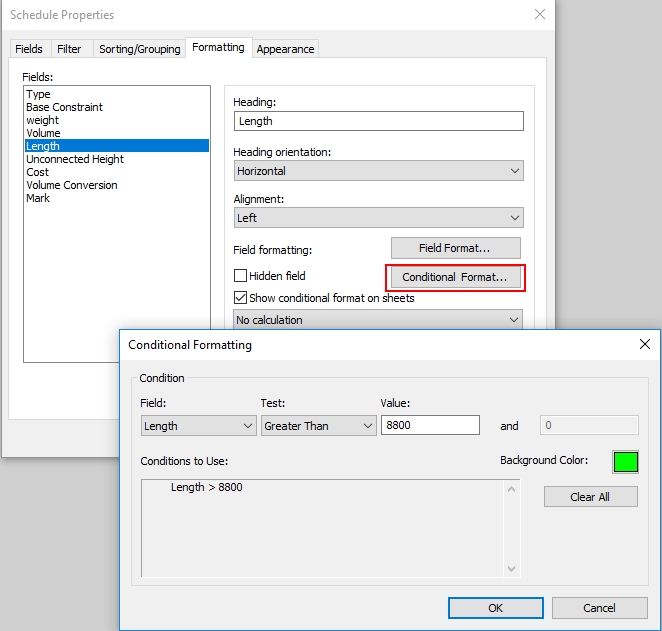
Similarly if a Panel is longer than 8.8m, I want to highlight it in Green. This is because all Precast Panels longer than 8.8m need to be delivered to site on a Flat Deck truck (instead of a Low loader) and needs to be less Wide. (See a useful graphic here)
Now that we have created our Schedule, we can let Revit check our panels and highlight to us when a Panel is too heavy or too long! If there are any then I can adjust accordingly. Very cool!
Revit Schedules are powerful. They are a great tool to help check and validate your model, and can save you many hours of manual checking and calculations.
If you have any other suggestions on how to use Revit Schedules then please share them in the comments below!
-Talk soon
P.S – I’d love to connect with you on Twitter: here
Stay up to date with the latest posts, Subscribe!


