Lets create a Checkbox schedule in Revit
When we have a checkbox (yes/no) parameter in a schedule, Revit defaults to display text (ie checked = “Yes”, unchecked = “No”)
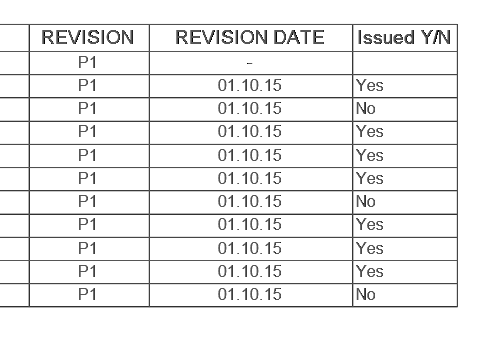
Some people prefer showing this graphically as a “check box”, this blog post will show you how to get it done.
In this example, we want to add an “Issued” field to a Sheet List schedule that can graphically be shown as checked or unchecked. We have created an “Issued Y/N” parameter and added it to all Sheets, and included it on the Sheet List Schedule. This currently shows up as a text field (See image above).
To make it a graphical “check box”, we first need to add a Calculated Value to the Scheduled Fields list. In the Schedule properties, click on Calculated Value.
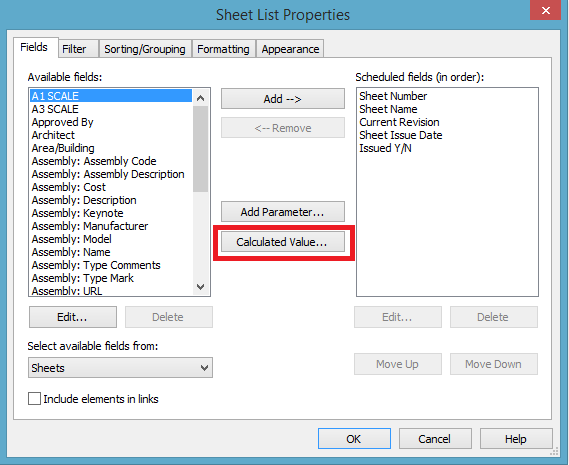
Give it a name, and for this example we are going to add a simple “if statement” formula where
IF ([Issued Y/N], “√”, “ᵡ”)
Which basically means, if the parameter [Issued Y/N] is checked, then show a √, if not show a ᵡ.
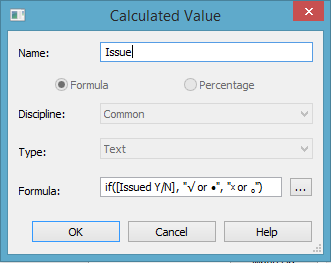
How we get the Checked/unchecked symbols is by running Windows Character Map. You have to copy symbols from the same font as your schedule (e.g you can’t paste Windings symbols into your schedule if the schedule font is Arial)
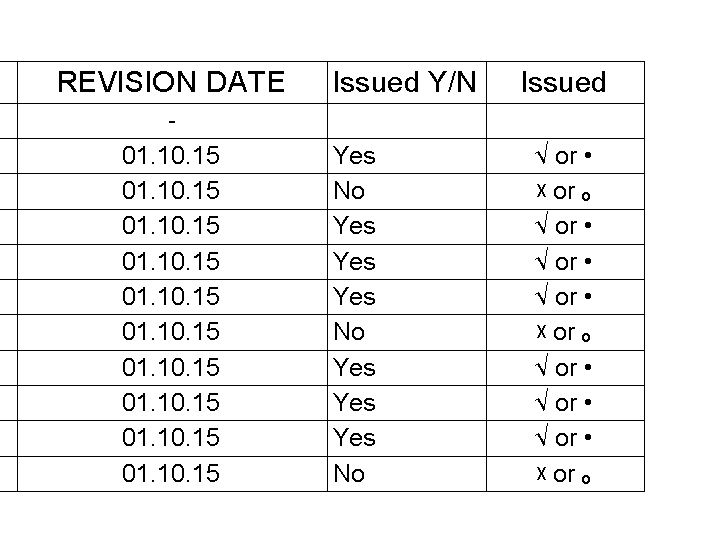
In this example I have used a Square root symbol (which kind of looks like a Tick) or a solid dot for Yes, and a Cross or hollow dot for unchecked. It’s up to you which one you want to roll with.
This results in a Schedule which looks like this:
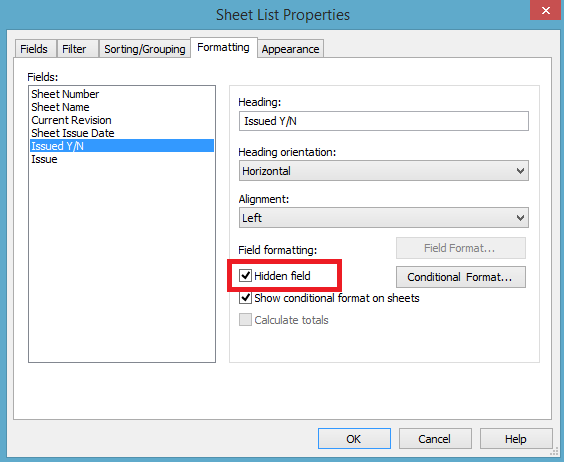
Now all we need to do is hide the “Issued Y/N” field from the schedule:
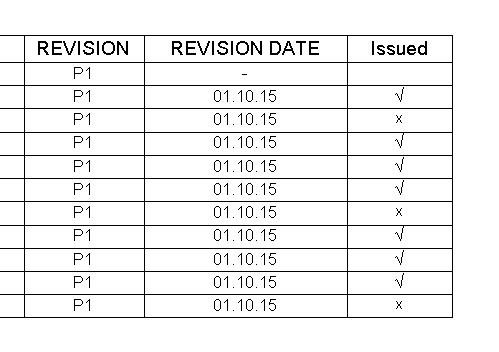
And Ta da! We now have a Sheet list schedule with a graphic check box for the “Issued” Field.
-Talk soon
P.S – I’d love to connect with you on Twitter: here
Stay up to date with the latest posts, Subscribe!


