Controlling Revit Rebar visibility in 3D Views
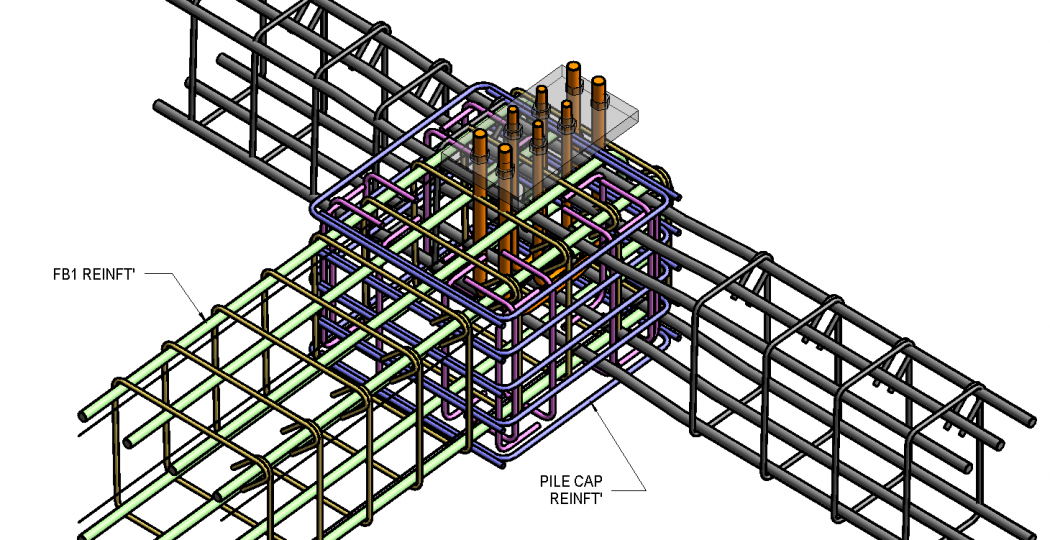
Modelling Revit Rebar is a fairly straight forward process. Select your rebar shape, cover, click on a host and your done (There’s a bit more to it than that, but that’s for a different blog post!). But often once you are done, your rebar model looks like a convoluted mess. Bars blend in with each other, and it’s extremely hard to follow and visualize.
So how do we get our rebar to ‘look good’ in a 3d view? – how can we make it easier to follow and look visually appealing as a presentation, and help the contractor put it all together?
First off, to control the graphic display of your Revit Rebar – select a bar, and on the Properties window under the “Graphics” tab, find “View Visibility States” and click edit:
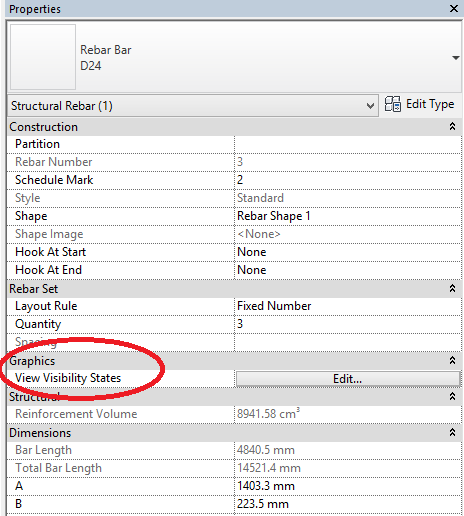
This opens up the “Rebar Element View Visibility states” Dialog box, where you can control the way your selected rebar is displayed for all views. For 3d views, selecting ‘View as solid’ shows the bar as a solid (go figure) – if unchecked, you will just see lines.
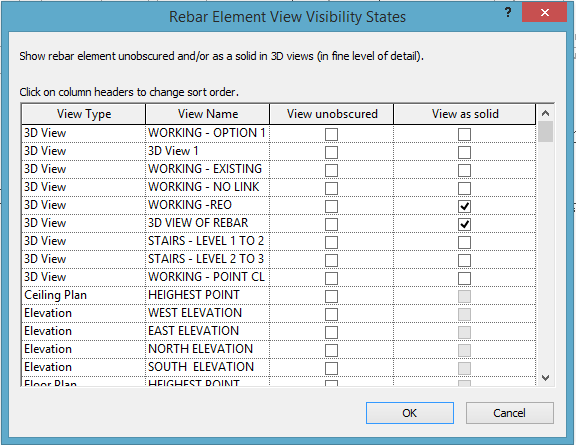
For all other views (plans/sections etc.) the Detail level of the view determines whether the rebar is solid or not. Course = Lines, Medium = Solid, Fine = Solid. If you wanted to show the rebar as Lines, but wanted to show the view as Fine – you can override the Detail Level of the Rebar with visibility graphics.
I suggest creating a new 3d view for the rebar you want to show, and use a ‘Section Box’ to zoom in and focus on the area that the bars are in. Using visibility graphics, hide all unnecessary elements and perhaps ONLY show the rebar to make it as clear as possible. From here you can select a bar, right-click and select “Override Graphics in View” and change the surface pattern of the selected Element.
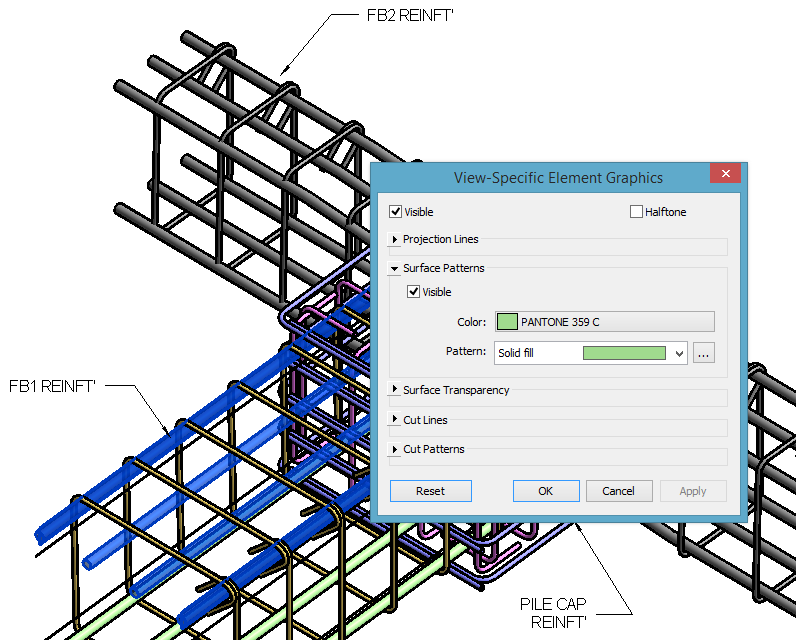
Another (perhaps better) way is to use a “Filter” override to display bar graphics by Diameter (D12, D16, D20 etc.), by Host Catagory (Floor, Wall, Foundation etc.), by Style (Stirrup/Tie, Standard etc.) or by any other designation you want. Once you have chosen your filters, just change the Surface pattern to visible – and select a colour that will stand out.
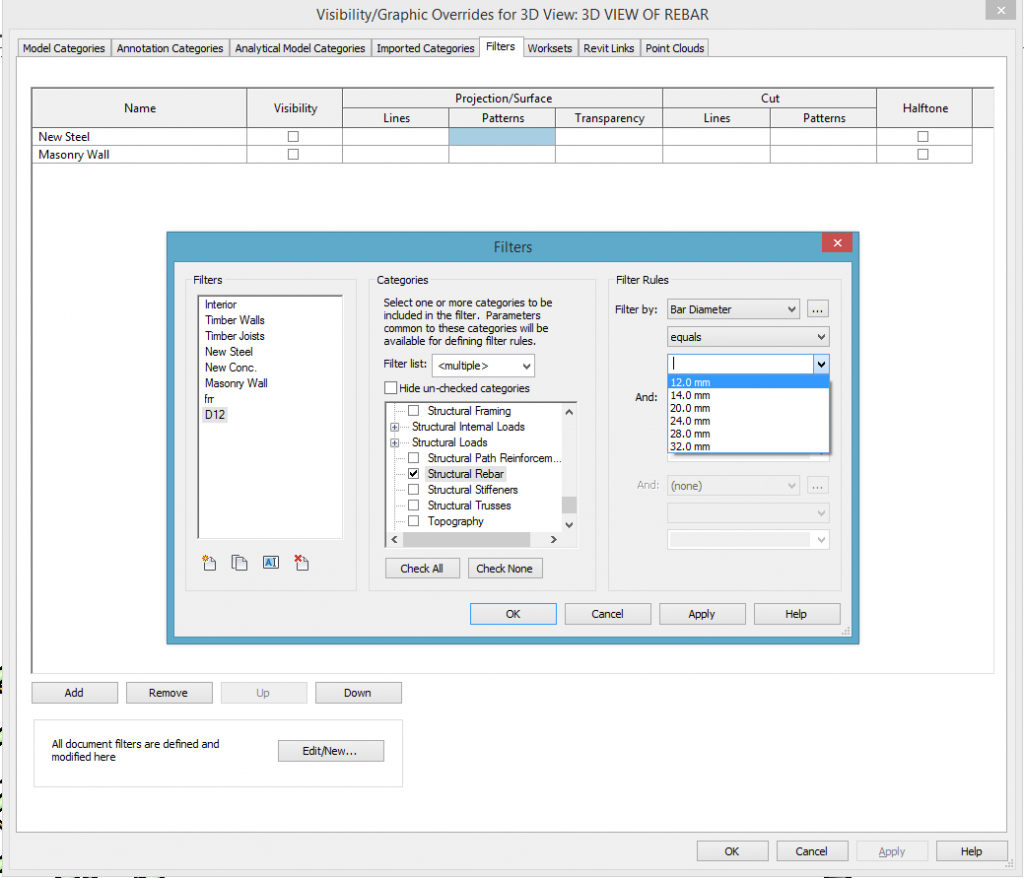
From here, select your view in the ‘Project Browser’, right-click and select “Create View Template From View”. Give your new View Template a name (‘Rebar Filter’ for example) and deselect every parameter EXCEPT ‘V/G Overrides Filter’.
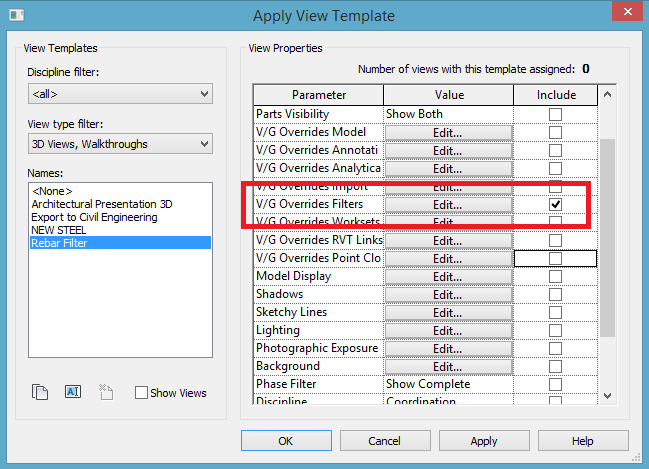
Now you can apply this View template to every other 3d rebar view you create, and the same visibility graphics will apply! Talk about efficient!
Hopefully this post has helped you understand how to control rebar visibility, and gave you some insights on working with Filters and View templates.
If you have any questions, or know a better way to work then please share in the comments!
Work smarter – Learn faster!
P.S – I’d love to connect with you on Twitter: here
If you enjoyed this post, Subscribe!

