
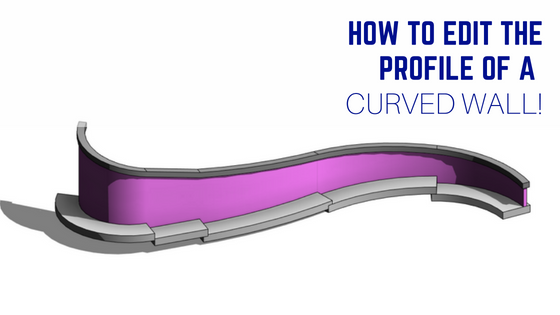
I was working on some interesting curved Retaining Walls in Revit the other day, and needed the top of the wall to slope and match the ground contours. When your walls are straight, you have the option to Edit the Profile by going into Sketch Mode and Editing the profile however you wish. However if your wall is Curved, the Edit Profile button is Greyed out and you cannot Edit the profile of your wall. So what do you do?!
There are a few different ways to create a sloped profile of a Curved Wall in Revit, but here are two of my favourites.
Edit Profile of curved wall in Revit – Void Cut Method
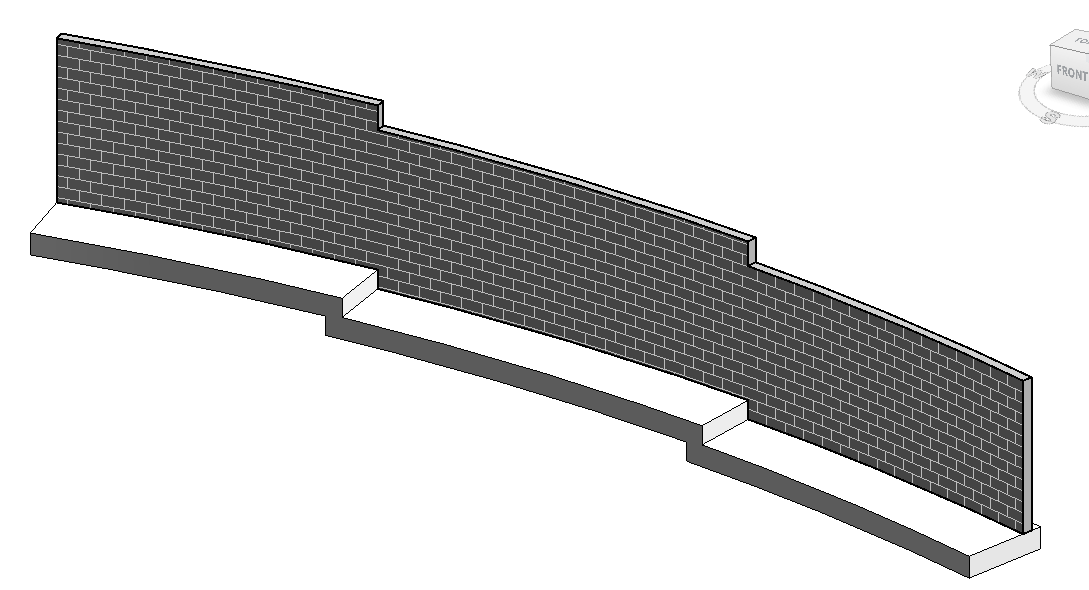
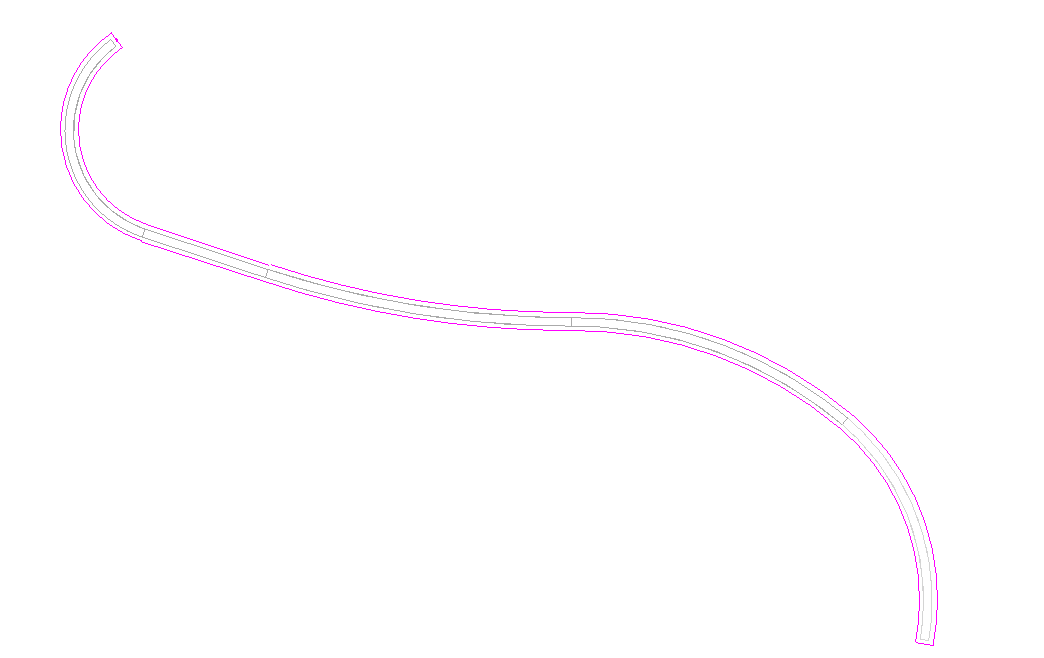
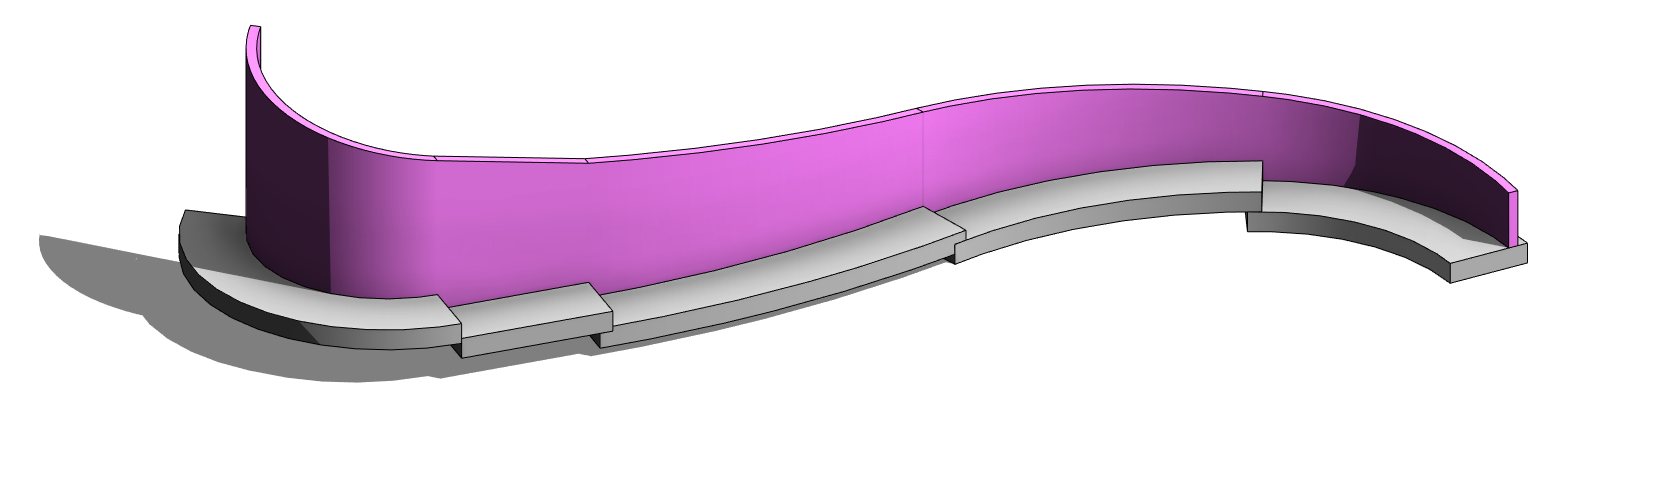
As you can see below we have a Curved Retaining Wall which is stepped at the top, but we would like it to have a smooth slope.
 The first thing we need to do is create an In-place Void component, then use that component to “cut-away” the tops of the retaining walls.
First go to a 3D view, and create an In-Place model component by navigating to the Structure Tab and clicking on Component. On the drop down, select Model In-place.

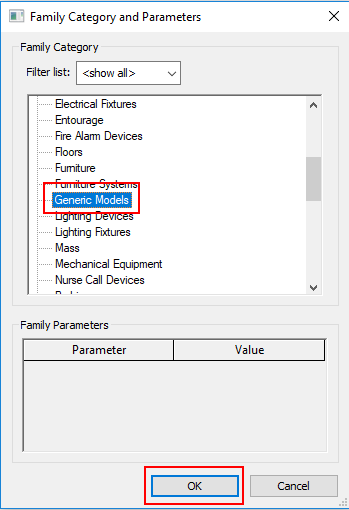
This brings up the dialog box, choose Generic Models, and click OK
Give it a name, I called mine Retaining Wall Slope Void
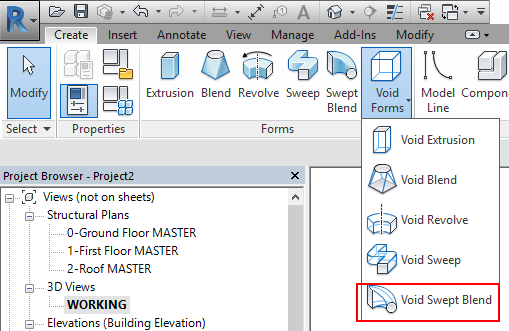
Now we want to create a Void form to cut the top of our Retaining Wall with. On the Create tab, find the Void Forms button and select Void Swept Blend from the drop-down options.
First thing we need to do is create the path for our Void Swept Blend. On the Modify tab, click Pick Path.
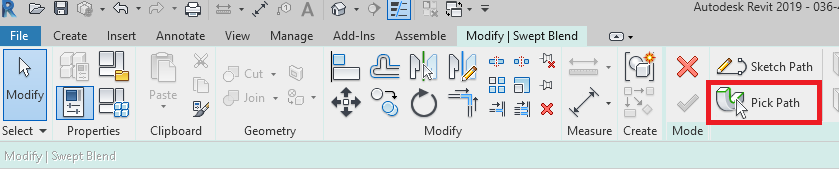
In your 3D view, pick the top of your retaining wall:
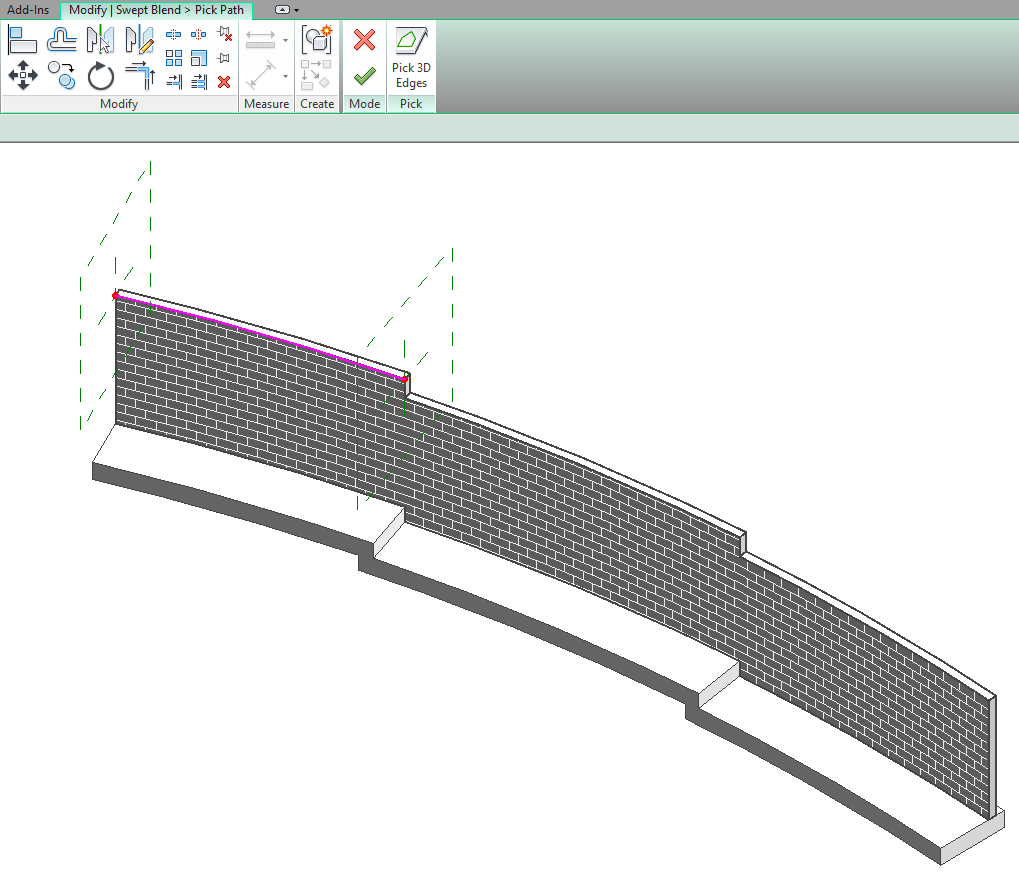
Make sure you drag the end of the sketch line so it covers the length of your Retaining Walls:
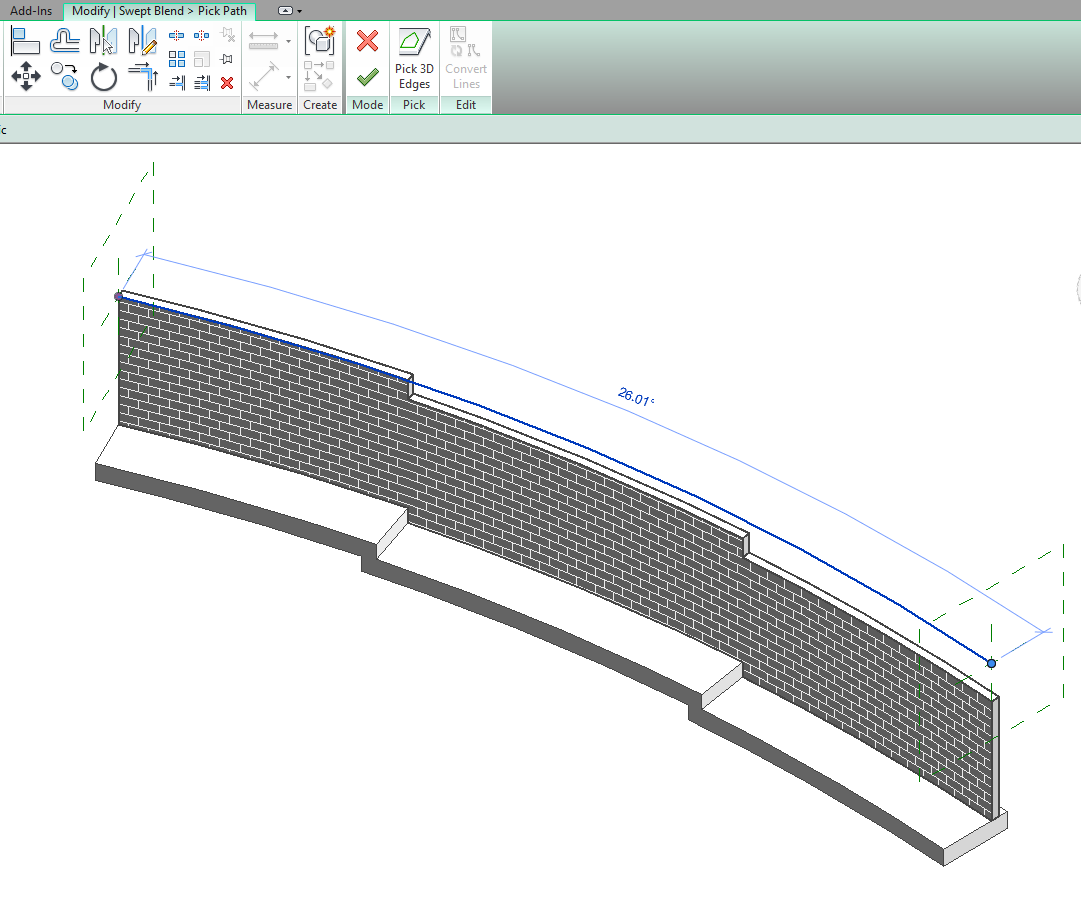
Once done, click on the Big Green tick.
Next, click on one of the Profile boxes and select the Modify | Swept Blend tab:
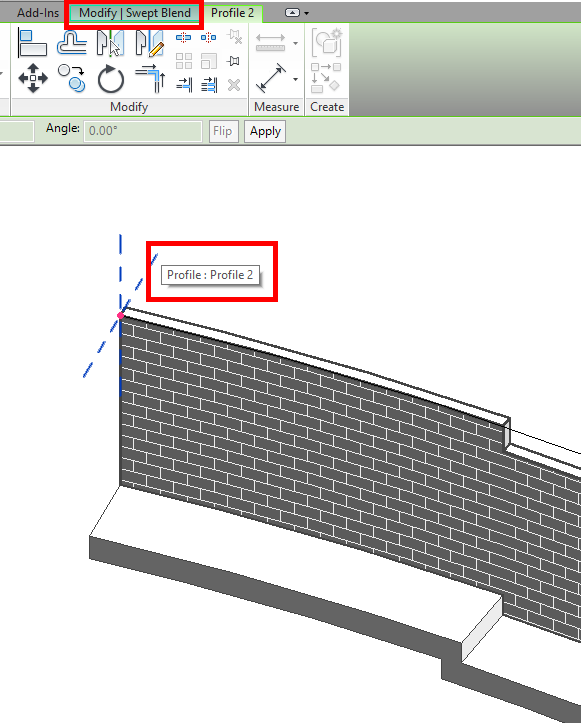
Click the Edit Profile button, and this will bring up the Sketch Mode where you can sketch in the shape of your first Profile:

Draw a rectangular shape and make sure it is wider than your Retaining Walls width. Once done click the big Green tick:
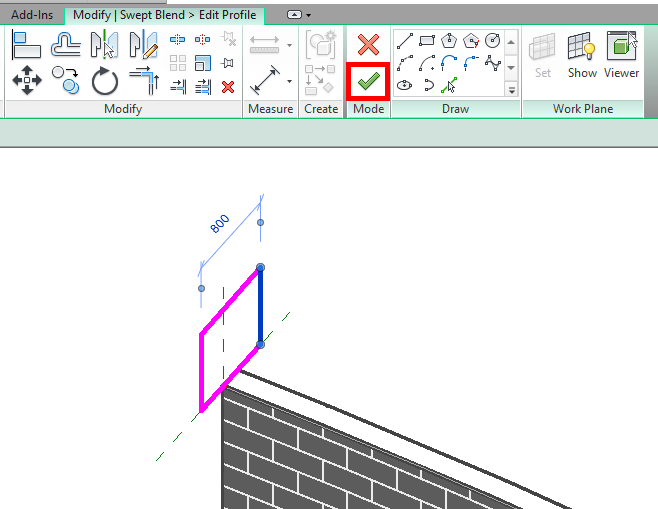
Next do the exact same thing for the remaining Profile:
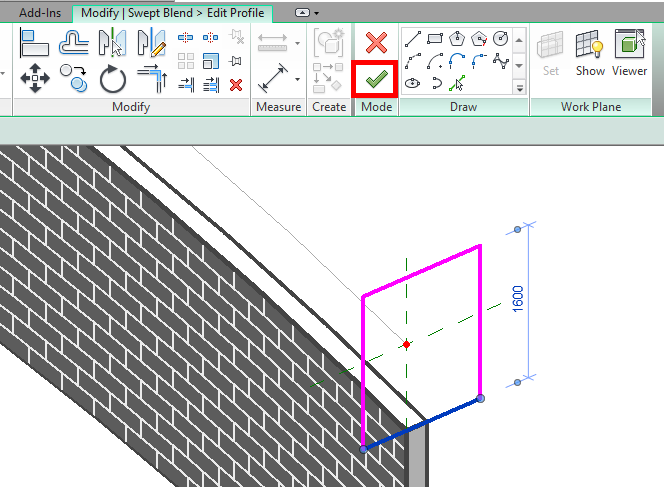
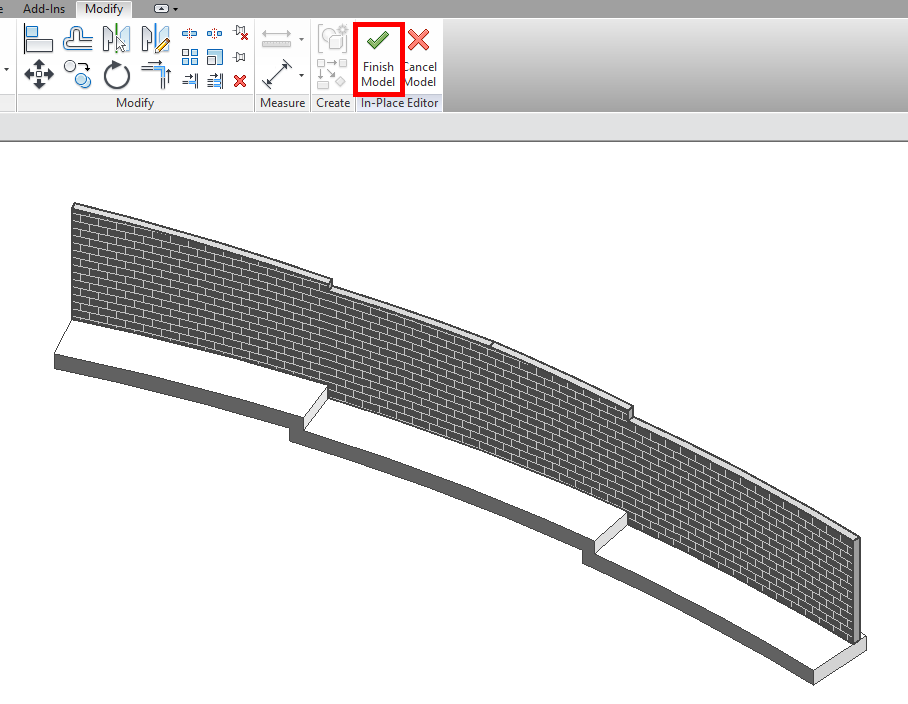
All you need to do now is click on the Green tick to finish the Swept Blend.
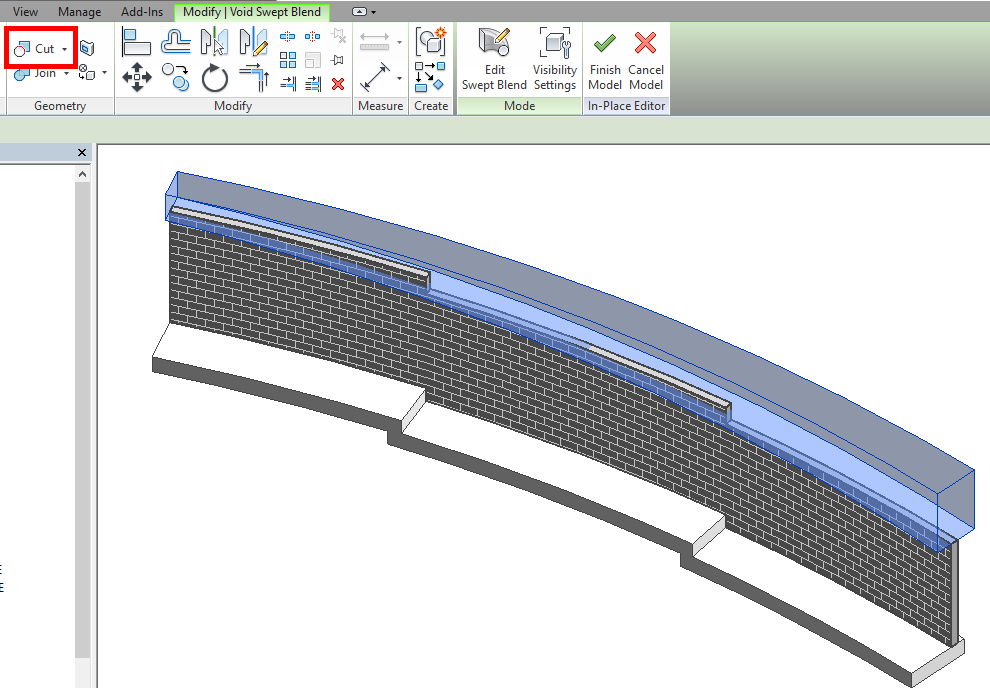
Now all that is left to do is to Cut the Walls with the Void Swept Blend you just made.
Select your Void Swept Blend then click on the Cut button:
Ensure the Multiple Cut check box is selected:
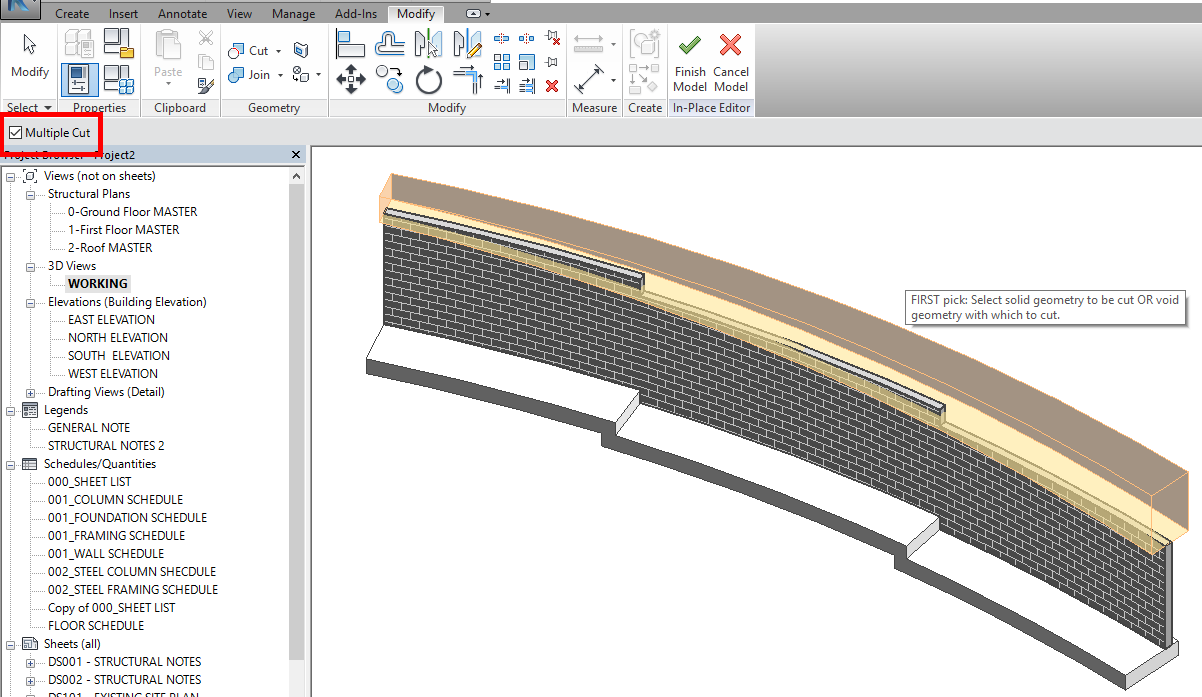
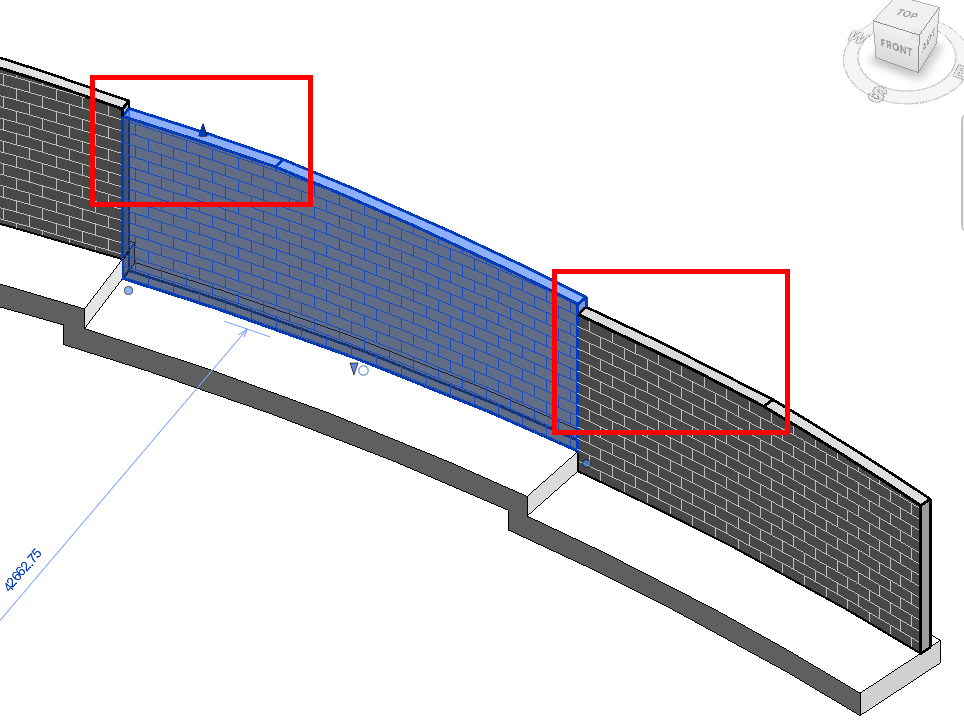
First click on the Void Swept Blend, then click on each wall that it passes through. Hit the Green Tick to Finish the Model:
Now you may be left with parts of the wall that did not get cut by your Void. All you have to do is click on the wall and drag up the arrow and it will automatically get cut by the Void:
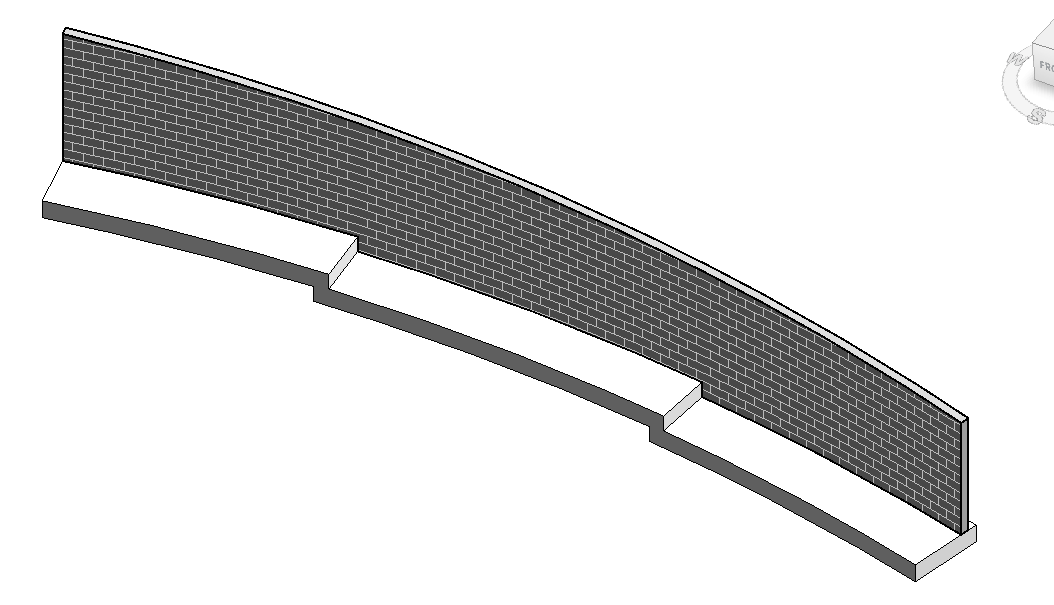
Boom! You have successfully edited the profile of your curved wall!
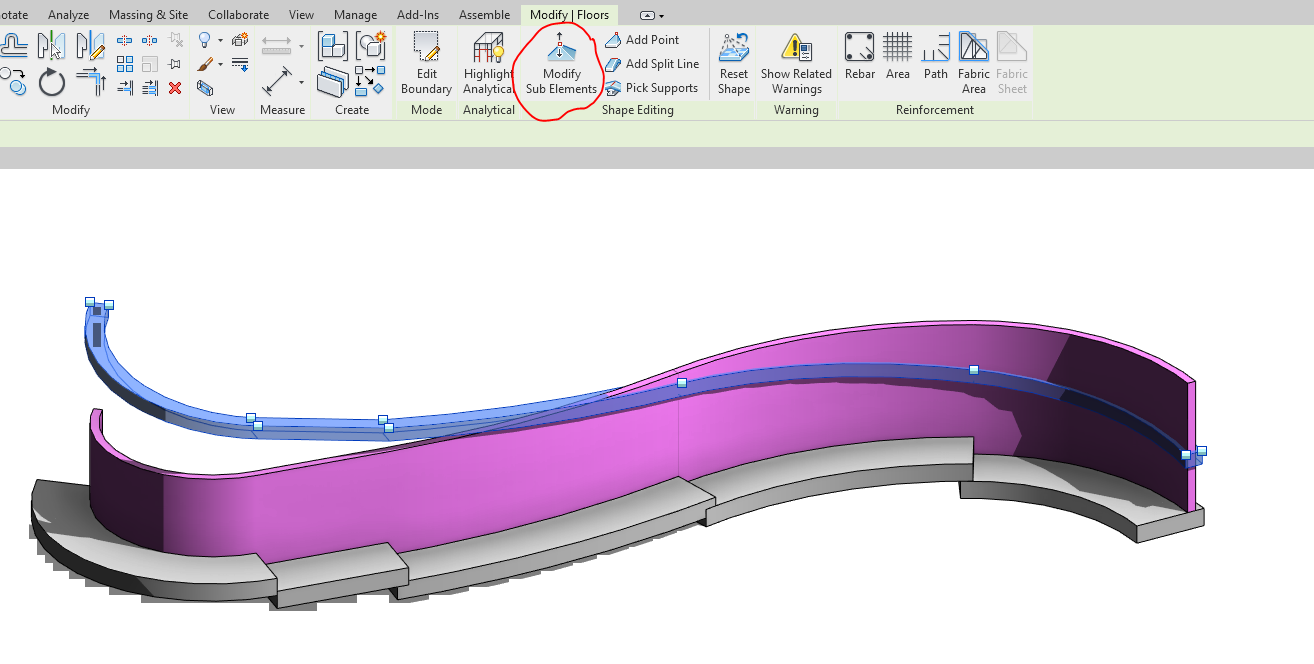
Edit Profile of curved wall in Revit – Attach to Floor Method
The next option is a bit more straight forward. We need to create a Floor which follows the curve of our Retaining wall. We then add the desired slope, then attach the Top of our walls to the new Floor.
Here we have a similar curved wall with a flat top which we would like to make sloped:
Jump into a Plan view, and create a new Floor which follows the Curve of your wall:
Once created, modify your Floor so that it slopes just how you want it too:
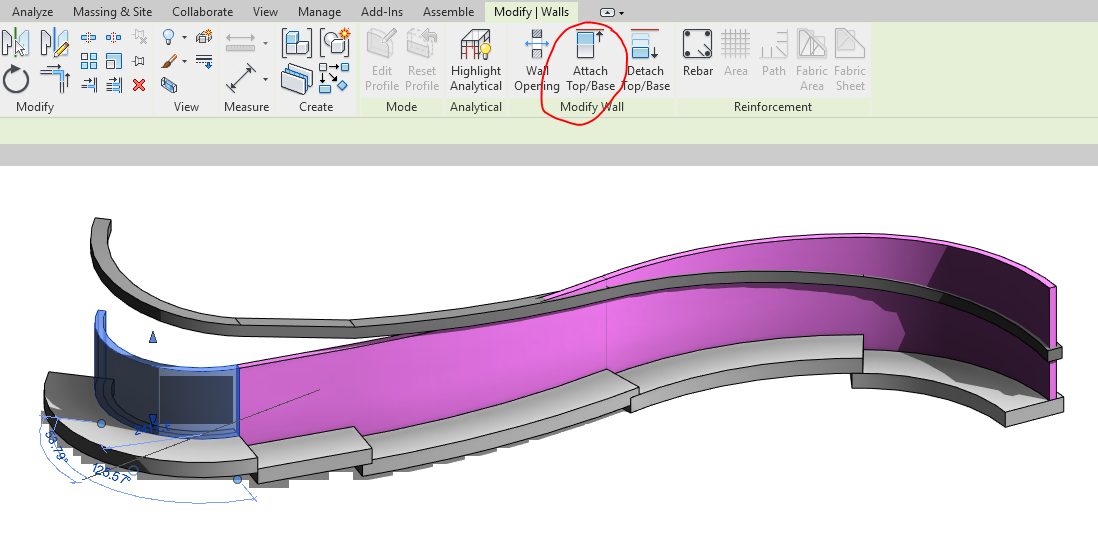
Next, select your walls and click Attach Top/Base on the Modify|Walls tab. Just click on your new Floor and the Wall will automatically attach to its base:
Now just Hide your floor in the View or add it to a Workset which is not visible:
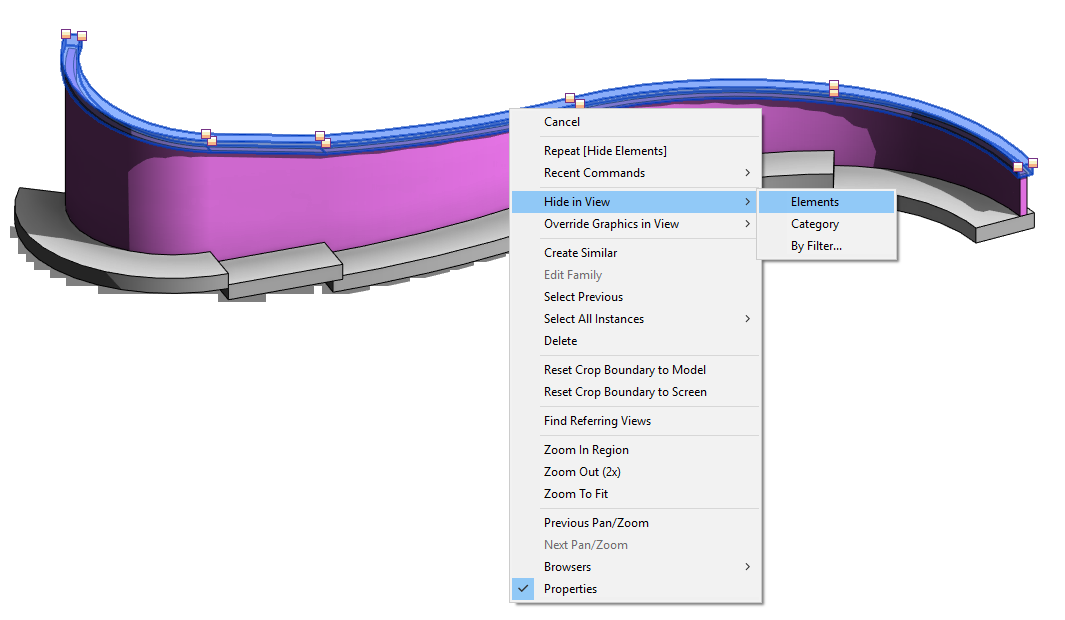
BOOM! The top of your Curved Retaining Wall is now sloping!
It can be a bit tricky trying to Edit Profile of curved wall in Revit. For straight walls it’s pretty easy, but having a curved wall means the Edit Profile option is unavailable.
Have you come across this issue before? What did you do? What’s your favourite Method out of the two above?
If you have any other suggestions on how to Edit Profile of curved wall in Revit then please share them in the comments below!
-Talk soon
P.S – I’d love to connect with you on Twitter: here
Stay up to date with the latest posts, Subscribe!


