As Draftspeople/Revit Technicians, its our job to create drawings. It’s true we create digital models and work in 3D, but at the end of the day our main deliverable’s are still 2D drawings on sheets of paper. In Revit, there are heaps of tools to help us create sheets quickly, and also help set them out so they are consistent and easy to read. In a complex project with maybe hundreds of sheets, these tools can be a great time saver but are often overlooked.
Creating sheets
Creating a new sheet in a project is pretty basic stuff. We can do this in a number of ways: First, we could right click ‘Sheets (all)’ in the project browser and select New Sheet.
Second, we could click on the View tab, and under Sheet Composition select the New Sheet button.

And thirdly, we could create a Keyboard Shortcut and just type the shortkey to create a new sheet (I have set this up as NS).
This is all very well and good, but creating sheets one at a time can be time consuming – what if we wanted to create Multiple sheets really quickly?
Creating Multiple sheets
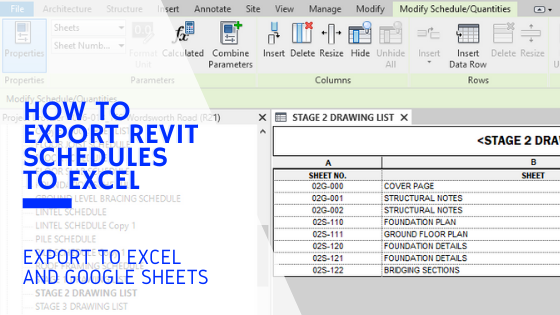
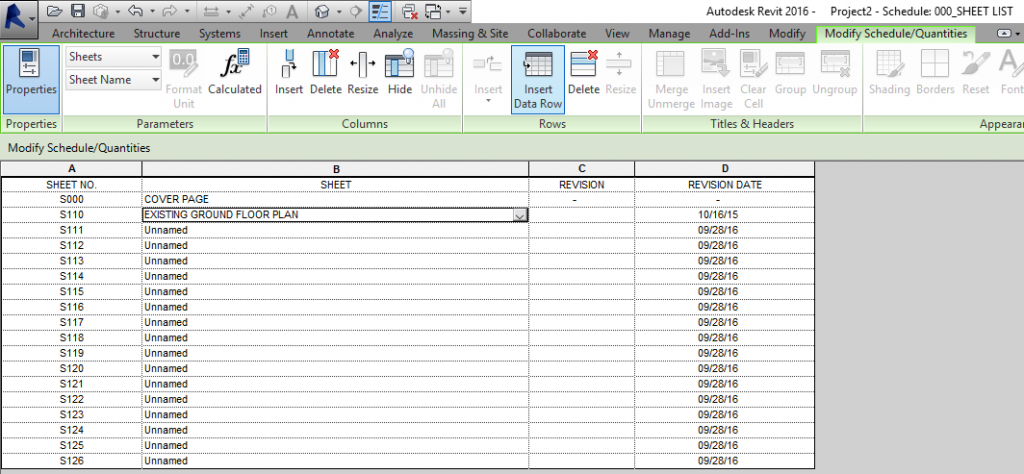
A good method that I use to create multiple sheets quickly is to use schedules. First we must open or create a Sheet List Schedule. Then on the Modify Schedules/Quantities tab, under Rows hit Insert Data Row.

Insert as many data rows as you want sheets(and as fast as you can click!) and notice how the sheet numbers are automatically created in ascending order. You could also name the Sheets here if you wish.
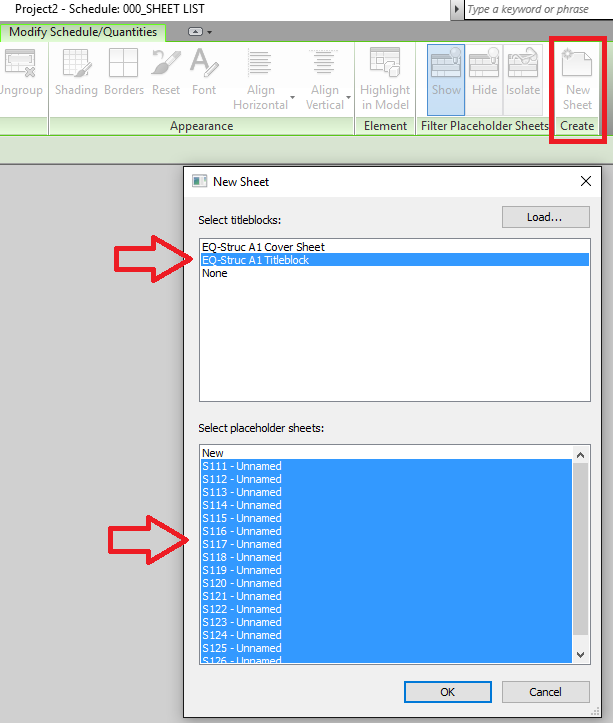
Now all you do is create a new sheet (By any method as described above) – select your Titleblock, then Select all the placeholder sheets you just created and hit OK. BOOM! – Multiple sheets created quickly with minimal effort.
Adding Views to a sheet
Adding views to a sheet is just as easy as creating sheets. You can simply drag and drop any View/Schedule/Legend onto a sheet, hit the Place View button under Sheet composition on the View Tab, or my favorite is creating a Keyboard Shortcut to do the work for you (I use PV)

Guide Grids
When creating a set of drawings, its always neater to have your views aligned from sheet to sheet. For instance, if you have a multi-story building it looks much better when each floor plan and schedules etc. are set-out in the exact same place. An easy method to achieving this is through the use of Guide Grids.
To create a new Guide Grid, you must be in a Sheet view. Head back to the View Tab and find the Guide Grid button under Sheet composition.

This opens a dialog box where you must name your Guide Grid. Name it to correspond to whatever Views you are trying to align. I usually use guide grids to align floor plans so one of mine is called “Floor Plans”. After clicking OK, you will see a light blue grid has now been created on your current sheet. You can adjust the grid spacing from the type properties. You can change the colour of the Guide Grids via Object Styles > Annotation Objects. I use a light blue colour so it doesn’t overpower your sheet. (Note Guide Grids don’t get printed)
Now all you do is align your View to the Guide Grid (or vice versa). The alignment works only for Levels, Grids, Reference Planes and view Crop boundaries. Unfortunately, you cannot use walls or other geometry.
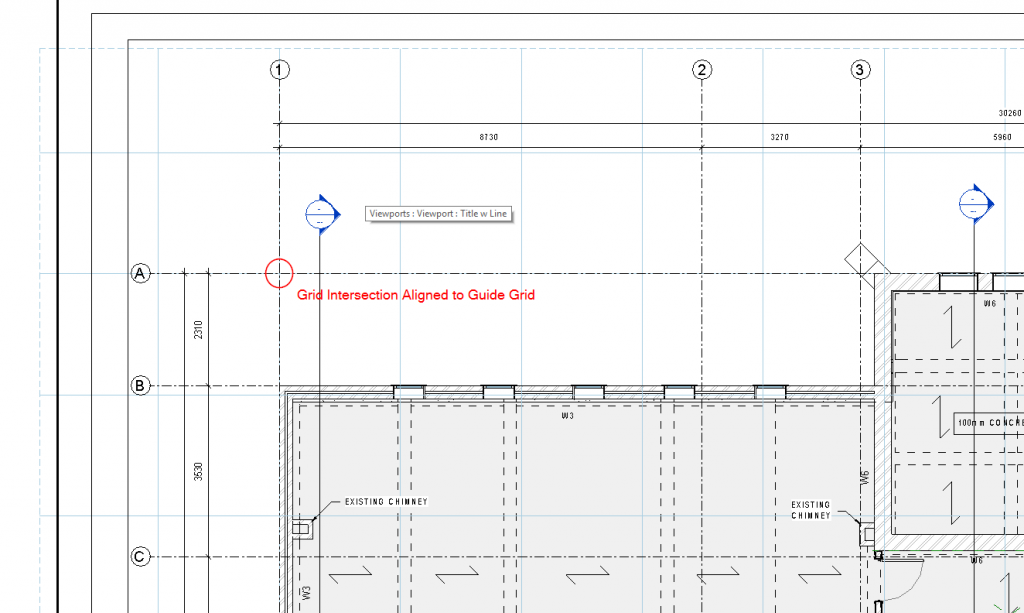
Now for every Sheet you have created, you can assign a Guide Grid from the Sheet properties.

Then all that’s left for you to do is align your view to the same place!
Creating Sheets and organizing Views in Revit is simple stuff, but creating multiple sheets and Guide grids are often overlooked and are great tips to know.
If you have any questions, or have some more tips for Organizing Views and Sheets then please leave a comment below!
If you found this post helpful, please feel free to share it.
-Talk soon
P.S – I’d love to connect with you on Twitter: here
Join the tribe and Subscribe!

